

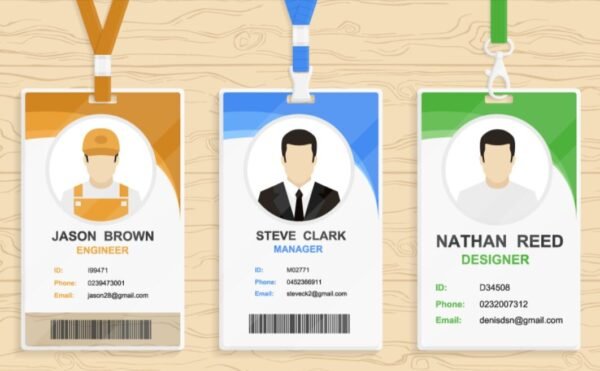
Creating professional ID badges for your employees doesn’t have to be a complicated or expensive process. With the right approach and understanding of basic design principles, any business can produce high-quality identification badges that serve practical purposes while presenting a polished, professional image. Whether you’re a small startup issuing your first employee badges or an established company looking to refresh your identification system, the design process can be straightforward and even enjoyable.
Starting With Clear Objectives
Before diving into design software or choosing colors and fonts, take time to define what you want your badges to accomplish. Different organizations have different priorities, and understanding your specific goals will guide all subsequent design decisions.
Some businesses primarily need badges for security purposes, requiring prominent photos and employee identification numbers. Others focus on customer service, emphasizing names and titles so clients can easily identify and address employees. Retail environments might prioritize company branding and role identification over detailed personal information.
Consider your workplace environment as well. Industrial settings require more durable materials and larger text that can be read at a distance or in poor lighting. Office environments can accommodate more detailed designs with smaller fonts and additional information. Customer-facing businesses benefit from badges that balance professionalism with approachability.
Gathering Essential Information
Once you’ve clarified your objectives, compile the information that needs to appear on each badge. At minimum, most professional badges include the employee’s name and company identification. Beyond these basics, consider including job title, department, employee ID number, and a photograph.
Job titles help customers and colleagues understand who can help with specific questions or tasks. Department information facilitates internal navigation in large organizations. Employee ID numbers support administrative processes and provide unique identification beyond names, which might not be unique in larger companies.
Photographs serve multiple purposes—they aid in identity verification, help people remember who they’ve spoken with, and add a personal touch to professional interactions. Decide on photo standards early, including background color, lighting, and head position, to ensure consistency across all badges.
Choosing Design Software and Tools
You don’t need expensive professional design software to create effective ID badges. Many accessible options exist for businesses with varying technical skill levels and budgets. Word processing software includes templates for business cards that can be adapted for ID badges. Basic graphic design programs offer more flexibility and control over layout and design elements.
Dedicated badge design software provides specialized features like photo positioning, barcode generation, and templates specifically for standard badge sizes. These programs often include design wizards that guide you through the creation process step by step. Some offer free trial periods, allowing you to test functionality before committing to a purchase.
Online design platforms provide another accessible option. These browser-based tools require no software installation and often include badge templates you can customize. They’re particularly useful for small businesses that need badges infrequently and don’t want to invest in specialized software.
Selecting the Right Badge Size and Orientation
Standard badge sizes exist for good reasons—they fit common badge holders, lanyards, and printing equipment. The most common size is CR80, which matches credit card dimensions and measures 3.375 inches by 2.125 inches. This size provides adequate space for essential information while remaining comfortable to wear.
Choose between horizontal and vertical orientation based on the information you’re displaying and how badges will be worn. Horizontal layouts work well for badges that emphasize company branding and can accommodate wider elements like logos. Vertical layouts are traditional for employee badges and make efficient use of space when badges hang from lanyards.
Some organizations use oversized badges for specific purposes, such as temporary visitor passes or event identification. These larger formats provide more space for information and are more visible from a distance, but they’re less comfortable for daily wear.
Creating an Effective Layout
Good badge design follows a clear visual hierarchy that guides the eye to the most important information first. Typically, this means the employee photo receives prominent placement, often in the upper third of the badge. The employee’s name should be highly visible, usually positioned below or beside the photo.
Leave adequate white space—areas without text or graphics—throughout the design. White space prevents badges from looking cluttered and improves readability. New designers often try to fill every bit of available space, but restraint creates more professional results.
Establish clear zones for different types of information. The top section might contain company branding, the middle section focuses on employee identification, and the bottom section includes supplementary information like emergency contacts or compliance certifications. This zoning creates organized, scannable layouts.
Selecting Fonts That Work
Font selection dramatically impacts badge readability and professional appearance. Choose fonts that are clear and easy to read at small sizes. Sans-serif fonts like Arial, Helvetica, or Calibri work well for most badge text. They remain legible even when printed at smaller point sizes.
Use font size strategically to create hierarchy. Employee names might be 14-18 points, titles might be 10-12 points, and supplementary information might be 8-10 points. Test your design by printing sample badges to ensure all text remains readable at actual size.
Limit yourself to two or three fonts maximum. Using too many different fonts creates a cluttered, unprofessional appearance. Instead, create variety through font weight (bold, regular, light) and size differences rather than switching between numerous font families.
Choosing Colors That Represent Your Brand
Color choices should align with your company’s existing brand identity. Using your brand colors creates consistency across all business materials and reinforces brand recognition. If your company uses blue and gray in logos and marketing materials, incorporate these same colors in badge design.
Consider color psychology as well. Blue conveys trust and professionalism. Green suggests growth and innovation. Red creates urgency and energy. Choose colors that align with the impression you want to create, but don’t let psychology override your actual brand colors.
Ensure adequate contrast between text and background colors. Dark text on light backgrounds or light text on dark backgrounds ensures readability. Avoid low-contrast combinations like yellow text on white backgrounds or dark gray text on black backgrounds.
Incorporating Company Branding
Your company logo should appear on every employee badge, creating instant brand recognition and establishing legitimacy. Position the logo prominently, typically at the top or bottom of the badge. Ensure the logo appears at high resolution and isn’t stretched or distorted.
If your company uses specific brand patterns, textures, or graphic elements in marketing materials, consider incorporating subtle versions into badge backgrounds. These elements should enhance rather than overpower the essential identification information.
Maintain brand consistency in every detail, from color values to font choices. This consistency projects professionalism and attention to detail that reflects positively on your entire organization.
Adding Photos Properly
High-quality photos are essential for professional-looking badges. Establish clear guidelines for employee photos: neutral background color, proper lighting, appropriate attire, and consistent head position. Have all photos taken by the same person using the same equipment and setup to ensure consistency.
Size and position photos consistently across all badges. A photo that’s too large crowds out other information, while photos that are too small fail to serve their identification purpose. Most badge designs allocate roughly one-third to one-half of the badge face to the photo.
Crop photos to focus on the employee’s face and shoulders. Full-body photos don’t reproduce well at badge size and make faces too small for effective identification. Ensure faces are centered and at consistent sizes across all employee badges.
Including Security Features
Even simple badges can incorporate basic security elements that deter counterfeiting. Use a subtle background pattern or watermark that’s difficult to reproduce with standard printers. Include issue dates or expiration dates that help identify outdated badges.
Consider using specialty materials or printing techniques for added security. Holographic overlays, UV-reactive inks, or microtext printing create verification features that are difficult to duplicate without specialized equipment. Balance security needs against budget constraints to find appropriate solutions.
Testing Before Full Production
Always create and evaluate sample badges before producing the full batch. Print several samples and wear them in typical workplace conditions for a few days. This testing reveals practical issues that might not be obvious during the design phase.
Gather feedback from actual employees who will wear the badges. They can provide valuable insights about readability, comfort, and functionality that designers might overlook. Make adjustments based on this feedback before committing to full production.
Check that information remains readable in various lighting conditions and from different distances. Verify that photos reproduce clearly and that all text is sharp and legible. These quality checks prevent expensive mistakes and ensure you’re satisfied with the final product.
Creating custom professional business ID badges is a achievable project for any organization willing to invest a bit of time and thought into the process. By following these guidelines and maintaining focus on your specific needs, you can design badges that serve practical purposes while enhancing your professional image.