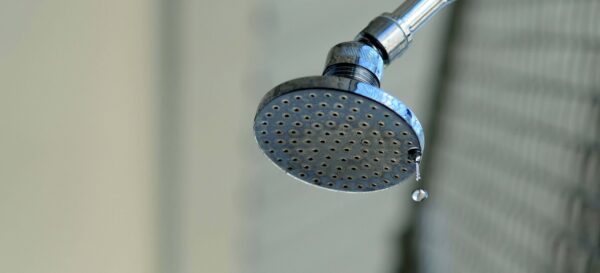
One of the best ways to stay cool during summer is to have a cold shower.
However, when there is a leak, it can get quite annoying fast. And there’s even more we can say about this overwhelming domestic damage.
Yes, by all means, having a leaking showerhead is not an awesome thing to reconcile with. The good news is that if you get irritated by noise quickly, you can solve this problem with our step-by-step repair guide in no time.
Give the shower head and handle an excellent clean
Probably, you know it, but we have to mention it, no doubt. Every repairing process at home – whether a DIY project or a professional plumbing service – starts with a decent disinfection. It’s not only because working on a clean surface is more convenient and pleasant.
It’s also because most damages happen due to grim and neglected maintenance through the years. Debris is the most common reason for both – the shower head and handle – to be clogged, eventually leading to a leak.
So there’s a huge possibility for your DIY repairing project to finish at this stage. But it’s not mandatory, unfortunately.
If the shower still leaks after the deep cleaning, you need some plumbing services or to keep reading this material to figure out how to solve your problem.
Turn off the water supply
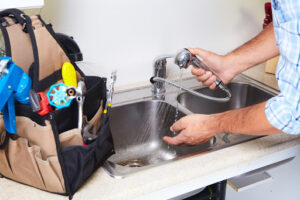
No matter the damage, what repairing plan you have, and who will restore it – you or a professional plumber – turning off the water supply is a must.
Every handyman starts with this, and there’s a reason for it. While fixing any broken item through which water runs, flood is very easy to be caused.
And by all means, the whole flooding can cause a more complicated headache than listening to the drip-dripping symphony from the bathroom every night. So, please, be aware of how to turn the water off in advance, but if you don’t, call a technician for the purpose.
Remove the showerhead
First of all, make sure to cover the shower drain hole. It’s another precautious measure that’s required before starting to fix the leak. It will help you to avoid any appearance of tiny pieces inside the hole.
Now, start dismantling the shower head. You might need a wrench to loosen the nut faster and easier. Attention: taking the head out won’t be that simple if this is an ancient shower. In this case, use a towel or some other textile to loosen the head.
Some pliers might have to be applied if the head is stuck too hard.
Soak the shower head in vinegar
Now let’s unclog each small hole of the shower head. No, you don’t have to do it mechanically.
Some homeowners try to do so by using a small needle, which is quite overwhelming, time-wasting, but mostly – dangerous. With the needle, you can damage the original shape of each hole in the shower head, and eventually, you can end up with an even louder leaking noise.
Instead, let the white vinegar do the absolute magic. Add up to 100 ml white vinegar to 200 ml lukewarm water. Use the mixture to soak the shower head for about 3 hours. Attention: if you live in a region with hard water, make it at least 8.
Check for a worn seal
It’s not just the head; the handle can cause some leaking issues in your shower. The rubber washers might have become non-functional due to ageing or bad maintenance. You can check this out only through a single touch of the surface.
Install an O-ring replacement
Your seal appeared to be too old during the check. If this is your case, you must replace the won seal with a new one.
Probably, it’s too old to be fixed, which is why it’s finally the best moment for you to switch to an O-ring seal. With it, you will avoid further issues more reliably.
Wrap the shower arm with thread-sealing tape
It’s not mandatory to make replacements to fix the leaky shower, so you can use that extra money to surprise your wife with a beautiful flower or a box of chocolates.
On top of that, you can do some budget-friendly repairs and deal with the problem in less than an hour. Using thread-sealing tape is a great way to stop the leaking. Wrap the entire shower arm with it and see if this works for you.
If, during the following night, your sleep gets interrupted by the drip-dripping noise, continue with our following two tips to put an end to it.
Consider a shower cartridge replacement
There’s a small cartilage inside the shower valve. First, dismantle it and see what size and type the cartilage is. Then, don’t hesitate to replace it with a new one.
The experts say that if unclogging doesn’t work for the leaky shower, the new cartilage is usually the answer to this problem.
Replace the faucet washer
Unscrew the faucet. Then, pull the handle as hard as possible to remove it from the tap. Use a puller to make this dismantling process easier. When you have the handle off, eliminate the trim and the covering sleeve.
Now, unscrew the stem by using a deep socket. For this purpose, you will have to unscrew the hex nut. See the faucet washer, and if you think that it’s pretty out of date, go to the store with the old one to buy the same size and model for replacement.
Conclusion
There are many ways to deal with a leaking shower head. And by all means, they will all sound pretty tough to handle at first.
Don’t worry if this is so for you. Hiring professionals in the plumbing sphere is always a good idea to consider.
But, no matter what you decide for your personal plan, it should end with successful fixing. Listening to this noise from the bathroom isn’t healthy for your sleep, and we hope you will get rid of its pain- and hassle-freely soon.


Be First to Comment